How to Generate Images in n8n: Automate Social Cards, Certificates and Reports
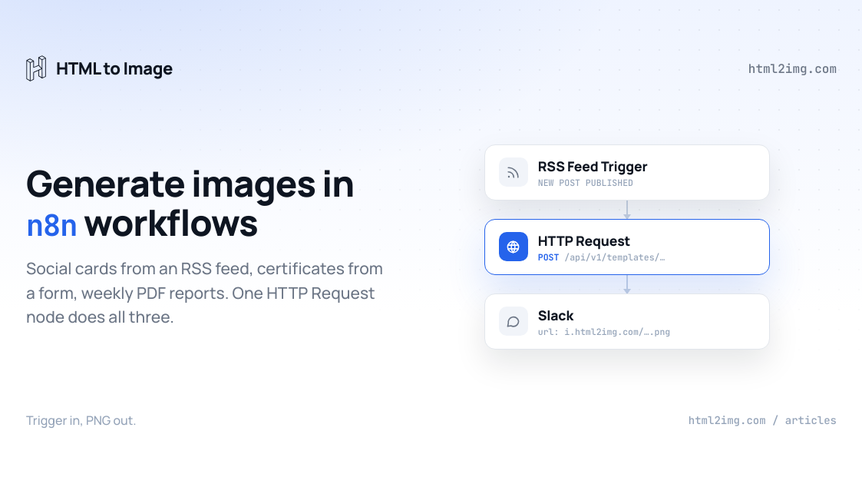
Every n8n workflow that talks to an audience ends the same way: a Slack message, a LinkedIn post, an email, a report dropped into a channel. The data side is automated end to end, and then the visual is not. Someone still opens a design tool to make the share card, the certificate waits for a manual export, and the Monday report ships as a wall of numbers because nobody had time to chart it.
You can close that gap with one node. n8n's stock HTTP Request node can call the HTML to Image API, which takes JSON in and hands back a finished PNG or PDF on a CDN URL. There is no community node to install and no headless browser to run, so it works identically on n8n Cloud and self-hosted, and it keeps working when n8n updates.
This guide builds three workflows you can copy: social cards generated from an RSS feed, completion certificates generated from a form submission, and a weekly report rendered as a PDF on a schedule. Each one is a trigger, at most one Code node, and an HTTP Request.
The two endpoints that matter
The API has two endpoints you will call from n8n.
POST https://app.html2img.com/api/v1/templates/{slug} renders one of 25 named templates. A template is a parameterised design hosted on the API side: you send a small JSON payload (a title, a name, a list of line items) and get back a tested image at known dimensions. The payload is validated server-side, so a missing field comes back as a clear 422 error rather than a broken image. This is the no-code path. There is no HTML anywhere in your workflow.
POST https://app.html2img.com/api/html renders raw HTML you supply. Real Chrome does the rendering, so grid, flexbox, custom fonts and inline JavaScript all behave exactly as they do in your browser. This is the full-control path: your design, your markup, assembled in a Code node.
Both return the same JSON shape:
{
  "success": true,
  "id": "abc123",
  "url": "https://i.html2img.com/abc123.png",
  "credits_remaining": 973
}
That url is a permanent CDN link, and it does a lot of quiet work in n8n: downstream nodes never touch binary data. You pass a short string to Slack, drop it into an email body, or write it back to a Google Sheet, and the image itself is served from the edge.
A workable rule of thumb: reach for a template when one fits your data shape, and reach for raw HTML when the design is yours. The three builds below use both.
Set up the credential once
Create an account and copy your API key from the dashboard. The free tier includes 25 renders a month and covers every template, which is enough to build and test all three workflows in this article before anything goes live.
In n8n, open any HTTP Request node and configure authentication:
Set Authentication to Generic Credential Type.
Set Generic Auth Type to Header Auth.
Create a new Header Auth credential with Name set to
X-API-Keyand Value set to your key.
Save it under a recognisable name like HTML to Image. Every workflow below reuses this one credential, and the key never appears in a node parameter or in an export of your workflow JSON. The authentication docs cover rotation if you ever need a new key.
Build 1: social cards from an RSS feed
The pattern: every time your blog publishes, generate a branded 1200 by 630 share card and post it to Slack alongside the link. Three nodes, no code.
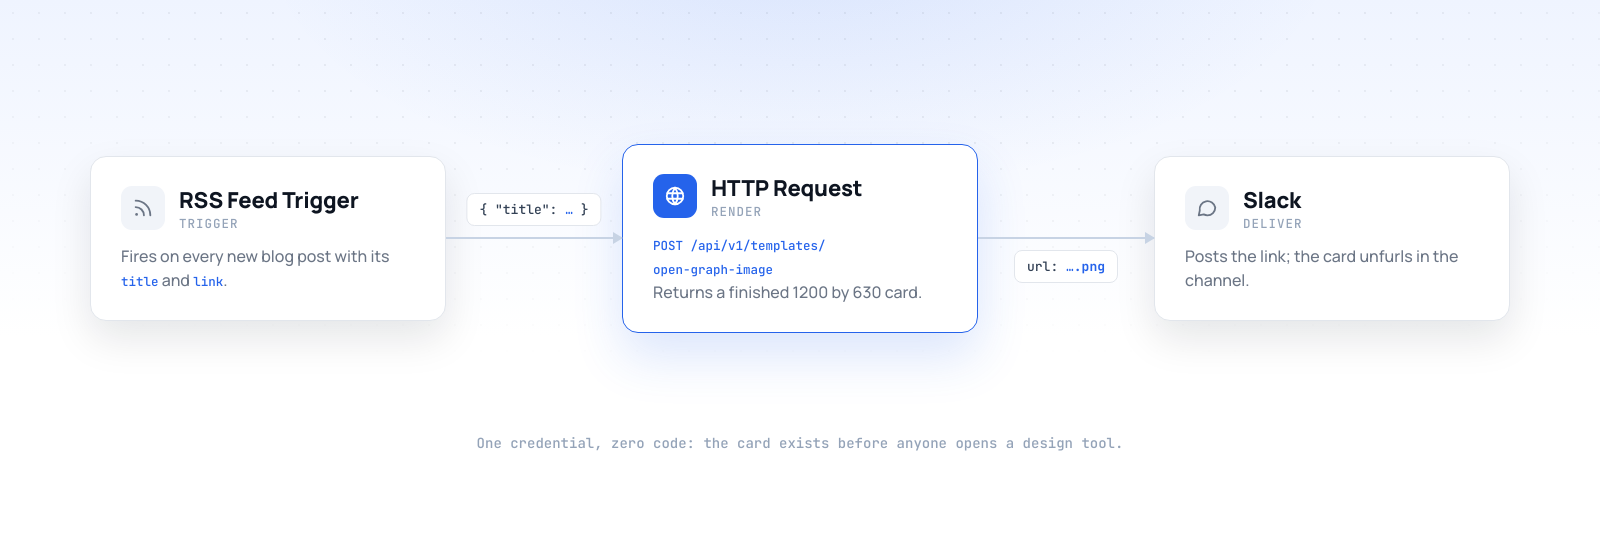
RSS Feed Trigger. Point it at your blog's feed and set a sensible poll interval. Each new post arrives as an item carrying title, link and creator fields.
HTTP Request. Configure it like this:
Method: POST
URL:
https://app.html2img.com/api/v1/templates/open-graph-imageAuthentication: the Header Auth credential from above
Body Content Type: JSON
Specify Body: Using JSON
Then the body, with an n8n expression pulling from the trigger:
{
  "title": {{ JSON.stringify($json.title) }},
  "subtitle": "Fresh on the blog"
}
Note the deliberate absence of quotes around the expression. JSON.stringify() wraps the title in quotes itself and escapes anything inside it. If you write "title": "{{ $json.title }}" instead, the workflow runs happily for weeks and then fails the day a post title contains a double quote. Letting stringify produce the whole value makes that class of failure impossible, and it is a habit worth applying to every hand-built JSON body in n8n.
The Open Graph image template also accepts optional fields for brand colours, so the card comes out in your palette without you writing a line of HTML.
Slack. Send a message containing the post link and {{ $json.url }} from the HTTP Request output. Slack unfurls the CDN URL into the card in the channel. Swap this node for LinkedIn, X or Buffer and nothing else changes: everything downstream of the render is just passing a URL around.
One refinement: if your CMS supports outgoing webhooks, replace the RSS Feed Trigger with an n8n Webhook node and cards generate the moment you hit publish rather than on the next poll.
Build 2: certificates from a form submission
Templates got Build 1 done without any markup. Certificates usually need your own design: a specific border, a signature line, your fonts. That is the raw HTML endpoint's job, and the clean n8n pattern is to assemble the whole payload in a Code node, then hand it to the HTTP Request untouched.
The workflow: n8n Form Trigger, then Code, then HTTP Request, then Gmail. The Form Trigger gives you a hosted sign-off form with no external service; a Typeform or Google Forms trigger slots in identically.
The Code node does the assembly:
const name = $json['Full name'];
const course = $json['Course'];
const date = new Date().toLocaleDateString('en-GB', {
  day: 'numeric', month: 'long', year: 'numeric'
});
const certId = 'NC-' + Date.now().toString(36).toUpperCase();

const html = `<!doctype html>
<html><head><meta charset="utf-8">
<style>
  @import url('https://fonts.googleapis.com/css2?family=Manrope:wght@500;700;800&family=JetBrains+Mono:wght@500&display=swap');
  body { width: 1200px; height: 850px; margin: 0; box-sizing: border-box;
         padding: 56px; background: #ffffff; font-family: 'Manrope', sans-serif;
         color: #0e1521; }
  .frame { height: 100%; border: 2px solid #2563eb; border-radius: 12px;
           box-sizing: border-box; padding: 64px; text-align: center;
           display: flex; flex-direction: column; justify-content: space-between; }
  .eyebrow { font-family: 'JetBrains Mono', monospace; font-size: 15px;
             letter-spacing: 0.2em; color: #2563eb; }
  h1 { font-size: 44px; font-weight: 800; margin: 12px 0 0; }
  .name { font-size: 56px; font-weight: 800; color: #2563eb; margin: 8px 0; }
  .body { font-size: 20px; color: #6b7585; line-height: 1.6; }
  .meta { display: flex; justify-content: space-between; align-items: flex-end;
          font-family: 'JetBrains Mono', monospace; font-size: 14px; color: #6b7585; }
  .sig { border-top: 1px solid #0e1521; padding-top: 8px; width: 220px; }
</style></head>
<body><div class="frame">
  <div>
    <div class="eyebrow">CERTIFICATE OF COMPLETION</div>
    <h1>Northgate Coffee Academy</h1>
  </div>
  <div>
    <p class="body">This certifies that</p>
    <div class="name">${name}</div>
    <p class="body">has successfully completed<br><strong>${course}</strong><br>on ${date}</p>
  </div>
  <div class="meta">
    <div class="sig">Course Director</div>
    <div>Verify: ${certId}</div>
  </div>
</div></body></html>`;

return [{ json: { html, width: 1200, height: 850, dpi: 2 } }];
Two details matter here. Template literals let the attendee's name drop straight into the markup with no string concatenation. And the node returns the complete API payload, html plus width, height and dpi, as its single output item.
That makes the HTTP Request node trivial. POST to https://app.html2img.com/api/html with the same credential, set Specify Body to Using JSON, and the entire body is one expression:
{{ JSON.stringify($json) }}No escaping, no fretting over the quotes, newlines and backticks buried in 40 lines of HTML. The Code node built a clean object; stringify serialises it correctly by definition. Here is what comes back:
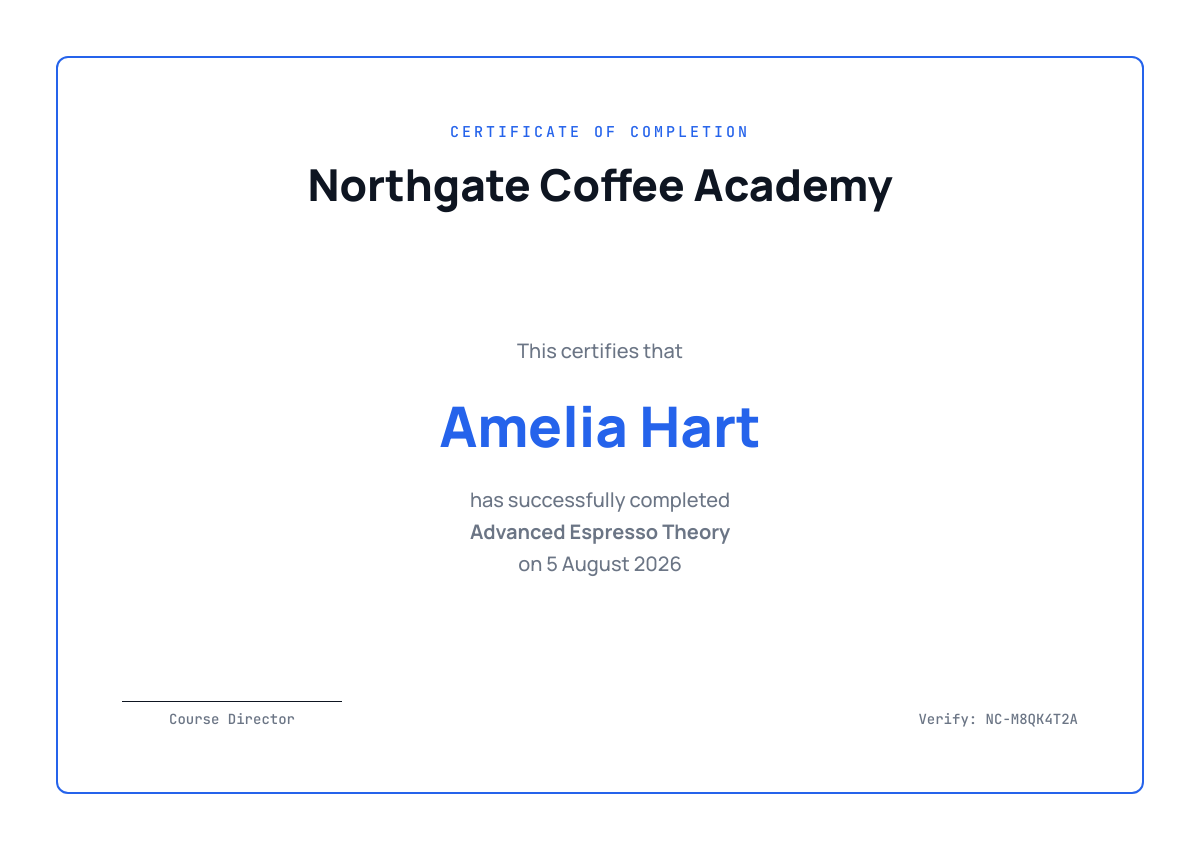
The dpi: 2 in the payload renders at double pixel density, so the certificate stays sharp on retina screens and survives being printed. The dpi parameter docs cover the trade-off: 2x roughly doubles render time.
Gmail closes the loop. Send an HTML email with the certificate inline:
<p>Congratulations! Your certificate is below.</p>
<img src="{{ $json.url }}" width="600" alt="Certificate of completion" style="max-width:100%">
Because the certificate is a PNG on a CDN rather than styled HTML in the email body, it looks identical in Outlook, Gmail and Apple Mail. That move, rendering the fragile part of an email as an image, is the whole subject of images in email that render everywhere.
Two upgrades for production. If you need verifiable IDs and signature images at real volume, generating signed digital certificates at scale walks through the full architecture. And if your certificate does not need a custom design after all, the certificate of completion template collapses this whole build back into Build 1's shape: form trigger, one HTTP Request carrying a name and a date, done.
Build 3: a weekly report PDF on a schedule
The third shape is the scheduled report: numbers out of a spreadsheet, into a designed document, delivered where the team already looks. It is the certificate build with two changes: a Schedule Trigger at the front and format: "pdf" in the payload.
The workflow: Schedule Trigger, then Google Sheets, then Code, then HTTP Request, then Slack.
Set the Schedule Trigger to Monday at 08:00. The Google Sheets node reads your metrics range, rows of week, signups and revenue or whatever you track, and returns them all. They arrive in the Code node via $input.all():
const rows = $input.all().map(i => i.json);
const latest = rows[rows.length - 1];
const max = Math.max(...rows.map(r => Number(r.signups)));

const bars = rows.map(r => `
  <div class="bar-row">
    <span class="label">${r.week}</span>
    <div class="track"><div class="bar" style="width:${(Number(r.signups) / max) * 100}%"></div></div>
    <span class="val">${r.signups}</span>
  </div>`).join('');

const html = `<!doctype html>
<html><head><meta charset="utf-8">
<style>
  @import url('https://fonts.googleapis.com/css2?family=Manrope:wght@500;700;800&display=swap');
  body { font-family: 'Manrope', sans-serif; color: #0e1521; padding: 48px; }
  h1 { font-size: 28px; margin: 0 0 4px; }
  .sub { color: #6b7585; margin: 0 0 32px; }
  .kpis { display: flex; gap: 16px; margin-bottom: 40px; }
  .kpi { flex: 1; border: 1px solid #e2e6ec; border-radius: 10px; padding: 20px; }
  .kpi b { display: block; font-size: 30px; }
  .kpi span { color: #6b7585; font-size: 14px; }
  .bar-row { display: flex; align-items: center; gap: 12px; margin-bottom: 10px; }
  .label { width: 90px; font-size: 13px; color: #6b7585; }
  .track { flex: 1; background: #eff4ff; border-radius: 4px; }
  .bar { height: 18px; background: #2563eb; border-radius: 4px; }
  .val { width: 50px; font-size: 13px; text-align: right; }
</style></head>
<body>
  <h1>Weekly growth report</h1>
  <p class="sub">Generated ${new Date().toLocaleDateString('en-GB')}</p>
  <div class="kpis">
    <div class="kpi"><b>${latest.signups}</b><span>Signups this week</span></div>
    <div class="kpi"><b>${latest.revenue}</b><span>Revenue this week</span></div>
    <div class="kpi"><b>${rows.length}</b><span>Weeks tracked</span></div>
  </div>
  ${bars}
</body></html>`;

return [{ json: { html, format: 'pdf' } }];
The bar chart is plain divs. CSS is a perfectly good charting library when real Chrome is your renderer, and it sidesteps the usual serverless charting dance entirely.
The HTTP Request node is identical to the certificate build: POST to /api/html, body {{ JSON.stringify($json) }}. The one meaningful difference is format: "pdf". The API returns an A4 portrait PDF instead of a PNG: proper vector output with selectable text and embedded fonts, and long content paginates automatically. Width and height are ignored in PDF mode, so leave them out; the format parameter docs have the details. If your report runs past one page, controlling page breaks in HTML to PDF output shows how to stop tables and cards splitting across pages with three CSS properties.
The Slack node then posts the returned url. The link ends in .pdf, opens straight in the browser, and nobody goes hunting through a shared drive on a Monday morning.
Notes before these run unattended
Renders are synchronous within a 30 second budget. Standard cards and certificates come back in a few seconds. If you render at high DPI or produce something heavy, pass a webhook_url in the payload: the API responds immediately and POSTs the finished file's URL to you when it is ready. In n8n that means a second workflow starting with a Webhook node, whose production URL you place in the payload. The webhook_url docs describe the delivery payload.
Do not re-render what has not changed. Every render costs one credit and every URL is permanent. If a certificate or card might be requested twice, write the URL back to your sheet or database on first render and serve the stored URL afterwards. An IF node checking whether the URL column is already populated is usually all it takes.
Let n8n absorb transient failures. In each HTTP Request node's settings, switch on Retry On Fail with a short wait between tries. Validation failures return a 422 with a details object naming the offending field, and n8n surfaces the response body in the execution log, so a broken payload is diagnosable without leaving the editor.
Watch the credit line. Every response includes credits_remaining. An IF node that pings your own Slack when it drops below a threshold takes two minutes to add, and means a busy month never silently stops certificates going out.
The three builds are shapes rather than fixed recipes. Swap the trigger and the RSS build becomes product card generation from a store webhook; the certificate build becomes event tickets from a booking form; the report build becomes a client-facing dashboard snapshot. The node layout never changes. Only the trigger and the markup do.
Need social cards, certificates or PDF reports rendered from your n8n workflows without running a browser yourself? Browse the templates gallery or read the docs to get started.

Written by
Mike Griffiths
Mike has spent the last 20 years crafting software solutions for all kinds of amazing businesses. He specializes in building digital products and APIs that make a real difference. As an expert in Laravel and a voting member on the PHP language, Mike helps shape the future of web development.