Open Graph Images in Statamic: From Meta Tags to Automatic Generation
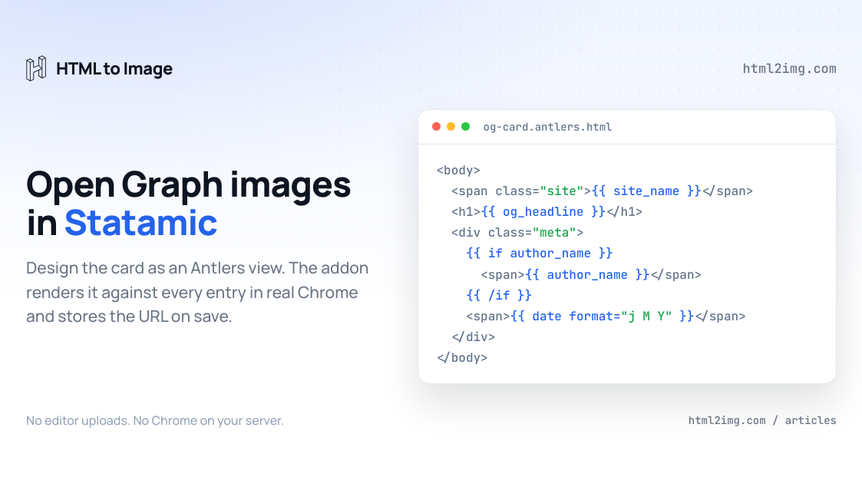
Share a Statamic URL on LinkedIn, Slack or X and out of the box you get a bare link. No card, no image, at best a title the platform scraped for itself. Statamic ships with no Open Graph handling at all: no social fields in the default blueprints, no meta partial, nothing in the <head>. That is a deliberate design decision, because your blueprints and layouts are yours, but it means og:image is always your problem to solve.
There are three levels to solving it. Wire the tags by hand, let an SEO addon do the mapping, or generate the image itself automatically. This guide walks through all three and ends with a setup where every entry gets a branded card on save, without anyone opening Figma.
The minimum viable setup: one field and one partial
Add an assets field to the blueprints you care about. Wherever it sits in your blueprint YAML, the field definition looks like this:
-
  handle: og_image
  field:
    type: assets
    container: assets
    max_files: 1
    display: 'Social share image'
Running this in production? Get an API key with 50 free credits, no card needed.
Then create a partial that turns the field into meta tags, with a static fallback for entries where nobody uploaded anything:
{{# resources/views/partials/og.antlers.html #}}
<meta property="og:title" content="{{ title }}">
<meta property="og:url" content="{{ permalink }}">
{{ if og_image }}
    <meta property="og:image" content="{{ glide:og_image width="1200" height="630" fit="crop" absolute="true" }}">
{{ else }}
    <meta property="og:image" content="{{ glide src="/img/og-default.png" width="1200" height="630" absolute="true" }}">
{{ /if }}
<meta property="og:image:width" content="1200">
<meta property="og:image:height" content="630">
<meta name="twitter:card" content="summary_large_image">
The Glide tag does two jobs here: it crops whatever the editor uploaded to the exact 1200 by 630 ratio the platforms want, and absolute="true" makes the URL fully qualified, which og:image requires. Include the partial in your layout's <head> with {{ partial:partials/og }} and you have working social cards.
This is fine for a brochure site. It falls over the moment you have more than a handful of pages, because every entry now depends on an editor producing and uploading a correctly sized image, forever.
Letting SEO Pro handle the tag cascade
If you would rather not maintain the meta layer yourself, SEO Pro maps your existing fields to every meta tag with cascading defaults you can override at the collection, taxonomy or entry level, and you add a single tag to your layout. Advanced SEO takes a similar approach with its own defaults cascade. Either is a sensible choice, and the approach below plugs into both.
Notice what these addons solve, though: the mapping and the output. The og:image tag gets wired up correctly, previews show you exactly how the card will look, and the cascade picks the right image for each page. What they cannot do is invent the pixels. The image still has to come from somewhere, and for most sites that means either an editor uploading one per entry or every page sharing the same generic site-wide card.
The image is the unsolved half
The obvious workarounds all have sharp edges. Designing each card by hand does not survive contact with a weekly publishing schedule. Glide can crop and filter an existing image but it cannot compose one, so no title text, no author line, no branding. Running headless Chrome on your own server with Browsershot or Puppeteer means owning a browser binary, its shared library dependencies and its memory appetite on every environment you deploy to, which is exactly the pain covered in our Browsershot alternative guide. And the satori-style generators that power @vercel/og only speak a subset of CSS, so the card you can build is constrained in ways real browsers are not, as catalogued in satori's CSS limits.
What you actually want is to design the card the same way you design everything else in Statamic, as a view with full CSS, and have something else worry about turning it into a PNG.
Automatic generation with Auto Open Graph Images
Auto Open Graph Images is our official Statamic addon. You write the card as an ordinary Antlers or Blade view, and on save the addon renders it against the entry in a queued job, sends the HTML to the HTML to Image API, where it is rendered in real Chrome, and stores the returned PNG URL on the entry. Because the design is a view in your project rather than a fixed template, flexbox, grid, custom properties and web fonts behave exactly as they do in your browser. It is built on the same core PHP SDK as our Laravel Open Graph guide, so if you run plain Laravel apps alongside Statamic, the same pipeline covers both.
Install it and add your API key to .env:
composer require html2img/statamic-og-imagesHTML2IMG_API_KEY=your-api-keyA key is free and comes with a monthly allowance of free credits, so you can wire the whole thing up without paying anything. See the authentication docs for issuing and rotating keys. Then open Tools, Open Graph Images in the Control Panel and choose which collections the addon should generate for. Settings resolve through a cascade: a site default, then a per-collection override, then a per-entry override. The addon also hashes the render inputs, so routine saves where nothing on the card changed do not trigger a render and do not spend credits.
Design the card as a normal view
The bundled default template lives at og-images::default. Publish it and edit it, or point the default_template setting at any view of your own:
php artisan vendor:publish --tag=statamic-og-images-viewsTemplates receive the entry's augmented data, so you reference fields exactly as you would on the frontend, plus a few extras the addon provides: og_headline (an override falling back to the title), og_subtitle, and site_name and site_logo from the settings. One caveat: author is a reserved Statamic field holding the entry's author user, so name your own byline field something like author_name. A card template is just HTML:
<body>
    <span class="site">{{ site_name }}</span>
    <h1>{{ og_headline }}</h1>
    <div class="meta">
        {{ if author_name }}
            <span>{{ author_name }}</span>
        {{ /if }}
        <span>{{ date format="j M Y" }}</span>
    </div>
</body>
Design in the browser, not by trial rendering. The addon ships a preview route that renders your template at the configured dimensions with no API key needed, since your browser renders the same HTML the API does: /cp/og-images/preview for sample data, or /cp/og-images/preview?entry=your-slug for a real entry. The same preview appears as a live iframe on the settings screen and on each entry's publish screen, and the Generate button on the publish screen runs a real render so you can confirm the PNG matches the preview. If you want a head start on the design itself, the Open Graph image template is a solid base to adapt.
Output the tags, or hand off to your SEO addon
In standalone mode, one tag in your layout's <head> does everything the manual partial did:
{{ og_image:meta }}That emits og:image with its width, height, alt and type, plus twitter:card and twitter:image, resolving a sensible cascade: an entry's custom image if an editor set one, then the generated image, then the site fallback. {{ og_image }} on its own returns just the resolved URL.
If SEO Pro or Advanced SEO already owns your <head>, keep it that way. Set the integration mode in config/statamic-og-images.php and the addon writes the generated URL into the field your SEO addon reads, then stays out of the meta business entirely:
'integration' => 'seo-addon',
'seo_field' => 'og_image', // whichever field your SEO addon reads for its social image
Storage, regeneration and one local gotcha
By default the addon stores the CDN URL on the entry, which plays well with static caching because the frontend outputs a plain static URL. If you would rather have no runtime dependency on the API at all, switch storage to asset and the PNG is downloaded into a Statamic asset container of your choosing instead.
After a template redesign, regenerate across your enabled collections from the command line:
php please og:generate
php please og:generate --collection=blog --force
--force ignores the input hash and re-renders everything.
One thing to know for local development: renders happen on the API's servers in real Chrome, so every URL in your template needs to be reachable from the public internet. A locally hosted asset on .ddev.site or .test shows in your browser preview but comes out missing in the rendered PNG. Reference publicly hosted assets, or expose your dev site with a tunnel such as ddev share while you test. Google Fonts and other CDN-hosted files always work because they are already public. In production this is a non-issue, since your asset URLs are public anyway.
Need Open Graph cards, certificates or invoices rendered from HTML without running a browser yourself? Browse the templates gallery or read the docs to get started.

Written by
Mike Griffiths
Mike has spent the last 20 years crafting software solutions for all kinds of amazing businesses. He specializes in building digital products and APIs that make a real difference. As an expert in Laravel and a voting member on the PHP language, Mike helps shape the future of web development.