---
title: "WordPress dynamic OG and social images"
description: "Generate branded WordPress Open Graph and social images automatically. Render per-post cards from HTML with one API call, no headless Chrome needed."
url: "https://html2img.com/articles/wordpress-dynamic-og-images/"
section: "Tutorials"
published: "2026-06-22T12:45:57.073Z"
updated: "2026-06-29T08:37:17.845Z"
---
# WordPress dynamic OG and social images
By Mike Griffiths. https://html2img.com/articles/wordpress-dynamic-og-images/
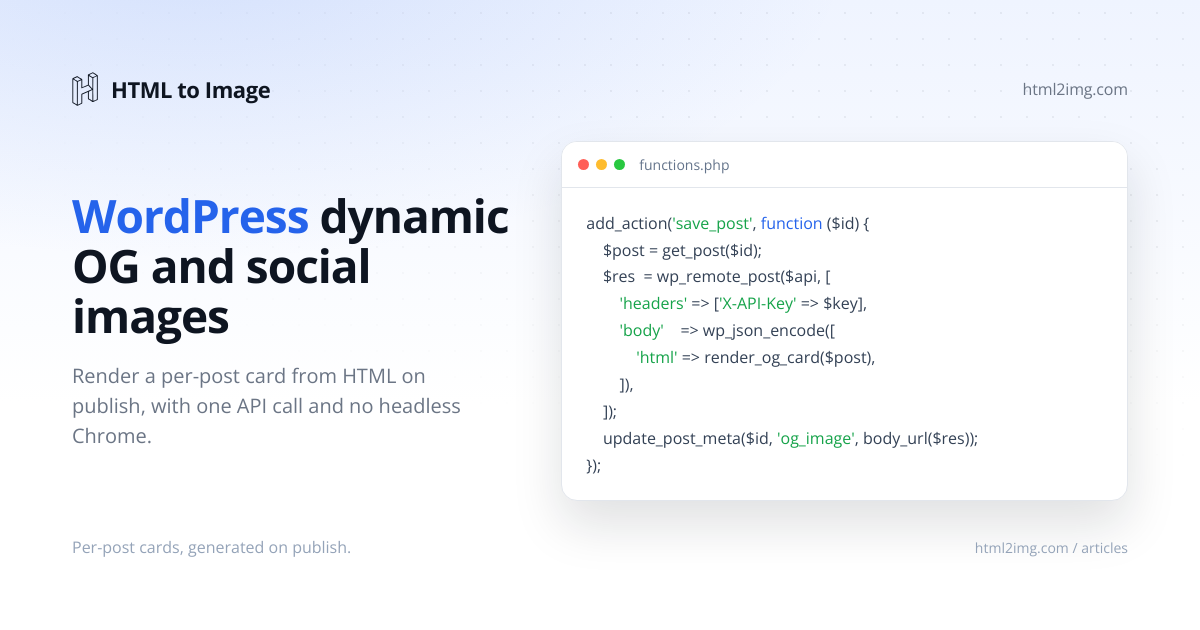
WordPress gives you almost nothing for social share images out of the box. Share a post on LinkedIn, Slack or X and the preview either pulls your featured image at the wrong aspect ratio, falls back to your site logo, or shows nothing at all. Featured images are not Open Graph cards. They are rarely 1200x630, they often have the focal point cropped in the wrong place and plenty of posts have no featured image set at all.
The usual fixes do not really solve it. Yoast and Rank Math let you set an Open Graph image per post, but you still have to make that image by hand for every post, which nobody keeps up with. The proper answer, a branded card per post with the title and author on it, means generating an image from HTML. On most WordPress hosting you cannot run headless Chrome or Puppeteer to do that. Shared hosts have no Node, tight memory limits and no way to install Chromium, and even on a VPS you do not want a browser process fighting PHP-FPM for RAM on every publish.
This guide renders the card somewhere else. You build the share image as an HTML template, send it to the HTML to Image API when a post is published, store the returned URL, then output the Open Graph and Twitter meta tags from it. No browser on your server, one HTTP request per post.
## Why featured images are not social cards
The Open Graph protocol is what Facebook, LinkedIn, Slack and the rest read to build a link preview. Twitter and X layer their own `twitter:` tags on top. The image they want is `og:image`, and the size that renders cleanly almost everywhere is 1200x630. You can read the spec at [ogp.me](https://ogp.me/) and the platform notes in the [Facebook sharing best practices](https://developers.facebook.com/docs/sharing/webmasters/).
A WordPress featured image is the wrong tool for three reasons. It is whatever dimensions the author happened to upload, so it gets cropped unpredictably in the preview. It usually carries no title or branding, so the share says nothing about the post. And on plenty of posts it is simply not set, which leaves you with a blank or a sitewide default. What you want instead is a card built from the post data, every time, at the right size.
## The flow: render from HTML, store the URL, print the tags
Three moving parts:
1. A function that builds the card as an HTML string from the post: title, site name, author, date.
2. A call to the HTML to Image API that turns that HTML into a PNG and hands back a URL.
3. A hook that runs the first two when a post is published or updated and stores the URL in post meta, plus a second hook that prints the meta tags in `wp_head`.
Everything below drops into a small plugin or your theme's `functions.php`. Keep your API key out of the code and in `wp-config.php`:
```
// wp-config.php
define( 'HTML2IMG_API_KEY', 'your_api_key_here' );
```
You get a key from your dashboard at app.html2img.com. The free tier is enough to wire this up and test it before you commit to anything.
## Building the share-card HTML
The card is just HTML and CSS, which is the whole point: it can match your brand rather than whatever a plugin decides to ship. Here is a 1200x630 template that takes the post title, the site name and the author, with a coloured accent bar.
```
function h2i_card_html( $post_id ) {
$title = esc_html( get_the_title( $post_id ) );
$site = esc_html( get_bloginfo( 'name' ) );
$author = esc_html( get_the_author_meta(
'display_name',
get_post_field( 'post_author', $post_id )
) );
$date = esc_html( get_the_date( 'j M Y', $post_id ) );
return <<
{$title}
{$site}
{$author} · {$date}
HTML;
}
```
Custom fonts render server-side, so the Google Fonts `@import` is applied properly rather than falling back to a system font. If you want a logo on the card, inline it as an SVG or a base64 data URI rather than a remote `![]() `, so it is guaranteed to be present when the page renders.
## Calling the API with `wp_remote_post`
WordPress ships its own HTTP client, the [WordPress HTTP API](https://developer.wordpress.org/plugins/http-api/), so you do not need to reach for Guzzle or raw cURL. `wp_remote_post()` sends the JSON, and you read the URL back off the response.
```
function h2i_render_card( $post_id ) {
$html = h2i_card_html( $post_id );
$response = wp_remote_post( 'https://app.html2img.com/api/html', array(
'timeout' => 30,
'headers' => array(
'Content-Type' => 'application/json',
'X-API-Key' => HTML2IMG_API_KEY,
),
'body' => wp_json_encode( array(
'html' => $html,
'width' => 1200,
'height' => 630,
'dpi' => 2,
) ),
) );
if ( is_wp_error( $response ) ) {
error_log( 'OG render failed: ' . $response->get_error_message() );
return false;
}
$code = wp_remote_retrieve_response_code( $response );
$data = json_decode( wp_remote_retrieve_body( $response ), true );
if ( 200 !== $code || empty( $data['url'] ) ) {
error_log( 'OG render returned no URL, status ' . $code );
return false;
}
return $data['url'];
}
```
A few things are worth setting deliberately. The `timeout` defaults to five seconds in WordPress, which is too short for an image render, so push it to 30. A `dpi` of 2 renders the card at twice the pixel density so it stays crisp on retina screens while keeping the 1200x630 layout. And always check `is_wp_error()` before you trust the response, because a timeout or a DNS hiccup comes back as a `WP_Error`, not an exception. There is a worked [PHP integration in the docs](https://html2img.com/docs/usage/php/) if you want the version outside WordPress.
## Generating the card when a post is published
Now hook it up. The cleanest trigger is `transition_post_status`, which fires when a post moves into the `publish` state, so you generate the card on first publish and on any later edit that republishes. Hooking `save_post` directly works too, but then you have to guard hard against autosaves and revisions, which fire it constantly.
```
add_action( 'transition_post_status', 'h2i_on_publish', 10, 3 );
function h2i_on_publish( $new_status, $old_status, $post ) {
if ( 'publish' !== $new_status ) {
return;
}
if ( 'post' !== $post->post_type ) {
return;
}
if ( wp_is_post_revision( $post ) || wp_is_post_autosave( $post ) ) {
return;
}
$url = h2i_render_card( $post->ID );
if ( $url ) {
update_post_meta( $post->ID, '_og_image', esc_url_raw( $url ) );
}
}
```
This stores the image URL in the `_og_image` post meta key. The leading underscore keeps it out of the custom-fields box on the editor screen, which is what you want for something generated automatically. The [transition\_post\_status reference](https://developer.wordpress.org/reference/hooks/transition_post_status/) and the page on [post status transitions](https://developer.wordpress.org/plugins/post-status-transitions/) cover the related hooks if you want finer control, for example treating a scheduled post going live differently from a manual edit.
If you would rather regenerate only when the title actually changes, store a copy of the title alongside the image and compare against it before calling the API, so editing the body does not burn a render.
## Printing the Open Graph and Twitter tags
The image is no use until the tags point at it. Hook `wp_head` and print them on single posts, falling back to the featured image and then a sitewide default so you never emit an empty `og:image`.
```
add_action( 'wp_head', 'h2i_print_og_tags', 5 );
function h2i_print_og_tags() {
if ( ! is_singular( 'post' ) ) {
return;
}
$post_id = get_queried_object_id();
$image = get_post_meta( $post_id, '_og_image', true );
if ( ! $image && has_post_thumbnail( $post_id ) ) {
$image = get_the_post_thumbnail_url( $post_id, 'full' );
}
if ( ! $image ) {
$image = 'https://example.com/default-og.png';
}
$title = esc_attr( get_the_title( $post_id ) );
$desc = esc_attr( wp_strip_all_tags( get_the_excerpt( $post_id ) ) );
$url = esc_url( get_permalink( $post_id ) );
$image = esc_url( $image );
echo "\n";
echo '' . "\n";
echo '' . "\n";
echo '' . "\n";
echo '' . "\n";
echo '' . "\n";
echo '' . "\n";
echo '' . "\n";
echo '' . "\n";
echo '' . "\n";
echo '' . "\n";
}
```
The `summary_large_image` Twitter card is the one that shows the full-width 1200x630 image rather than a cramped thumbnail.
### Living with Yoast or Rank Math
If you run an SEO plugin it already outputs `og:` tags, and you do not want two `og:image` tags arguing with each other. The tidy option is to keep the plugin for everything else and override only the image. Yoast exposes filters for exactly this:
```
add_filter( 'wpseo_opengraph_image', 'h2i_seo_og_image' );
add_filter( 'wpseo_twitter_image', 'h2i_seo_og_image' );
function h2i_seo_og_image( $image ) {
if ( is_singular( 'post' ) ) {
$custom = get_post_meta( get_queried_object_id(), '_og_image', true );
if ( $custom ) {
return $custom;
}
}
return $image;
}
```
With that filter in place you drop the manual `wp_head` printer above and let Yoast emit the tags, just with your generated image. Rank Math has equivalent `rank_math/opengraph/facebook/image` and `rank_math/opengraph/twitter/image` filters that take the same callback.
## Handling slow renders with a webhook
A single card renders comfortably inside the 30 second window, so the synchronous call above is fine for normal publishing. If you are rendering very large or complex cards, or generating a batch at once, switch to the asynchronous mode: pass a `webhook_url` and the API renders in the background, then POSTs the finished URL to your endpoint. This sidesteps the [30 second timeout](https://html2img.com/docs/parameters/webhook-url/) entirely.
Register a REST route to receive it:
```
add_action( 'rest_api_init', function () {
register_rest_route( 'h2i/v1', '/og-ready', array(
'methods' => 'POST',
'permission_callback' => '__return_true',
'callback' => 'h2i_receive_webhook',
) );
} );
function h2i_receive_webhook( WP_REST_Request $request ) {
$post_id = absint( $request->get_param( 'post_id' ) );
$url = esc_url_raw( $request->get_param( 'url' ) );
if ( $post_id && $url ) {
update_post_meta( $post_id, '_og_image', $url );
}
return new WP_REST_Response( array( 'ok' => true ), 200 );
}
```
Include your own post ID in the original request so you know which post the finished image belongs to when the webhook fires. In production, lock the endpoint down with a shared secret in the `permission_callback` rather than `__return_true`, since anything on the internet can POST to a public REST route.
## Backfilling existing posts with WP-CLI
New posts are covered by the publish hook, but you will want cards for everything already published. [WP-CLI](https://wp-cli.org/) turns the backfill into a single command you can run over SSH.
```
if ( defined( 'WP_CLI' ) && WP_CLI ) {
WP_CLI::add_command( 'og generate', function ( $args, $assoc ) {
$force = isset( $assoc['force'] );
$posts = get_posts( array(
'post_type' => 'post',
'post_status' => 'publish',
'posts_per_page' => -1,
'fields' => 'ids',
) );
foreach ( $posts as $post_id ) {
if ( ! $force && get_post_meta( $post_id, '_og_image', true ) ) {
WP_CLI::log( "Skipping {$post_id}, already has a card" );
continue;
}
$url = h2i_render_card( $post_id );
if ( $url ) {
update_post_meta( $post_id, '_og_image', esc_url_raw( $url ) );
WP_CLI::success( "Rendered {$post_id}" );
} else {
WP_CLI::warning( "Failed {$post_id}" );
}
sleep( 1 ); // stay under the rate limit on a large site
}
} );
}
```
Run it with `wp og generate`, or `wp og generate --force` to rebuild every card after a template change. The `sleep( 1 )` keeps you from hammering the API when you have hundreds of posts to process.
## Storing the PNG in the media library instead
Pointing `og:image` straight at the returned URL is the simplest setup and works fine. If you would rather host the file yourself, in your own media library and behind your own CDN, sideload it after rendering.
```
function h2i_save_to_media( $post_id, $image_url ) {
require_once ABSPATH . 'wp-admin/includes/media.php';
require_once ABSPATH . 'wp-admin/includes/file.php';
require_once ABSPATH . 'wp-admin/includes/image.php';
$attachment_id = media_sideload_image( $image_url, $post_id, null, 'id' );
if ( ! is_wp_error( $attachment_id ) ) {
update_post_meta(
$post_id,
'_og_image',
wp_get_attachment_url( $attachment_id )
);
}
}
```
That copies the rendered PNG into `wp-content/uploads`, registers it as an attachment and stores the local URL in the same meta key. The tradeoff is more storage and a second network round trip on every publish, so only do it if you have a concrete reason to keep the files inside WordPress.
## Skipping the HTML with a named template
If you would rather not maintain the card markup in PHP at all, render against a hosted [Open Graph image template](https://html2img.com/templates/open-graph-image/) and POST only the post data as JSON, which keeps the design out of your codebase entirely. The [blog hero template](https://html2img.com/templates/blog-hero/) covers in-article header images if you want those generated too, and there is a no-code [Open Graph image generator](https://html2img.com/tools/open-graph-image/) for the occasional one-off card.
The rendering approach carries straight across stacks, so the same pattern works wherever you publish. There are companion guides for [dynamic OG images in Laravel](https://html2img.com/articles/how-to-generate-dynamic-open-graph-images-in-laravel/), [in Rails](https://html2img.com/articles/dynamic-og-images-in-rails/) and [in Next.js](https://html2img.com/articles/dynamic-og-images-nextjs-without-vercel-og/). If you have tried a Satori-based renderer and hit its CSS limits, [why @vercel/og fails on emoji](https://html2img.com/articles/why-vercel-og-fails-on-emoji-and-how-to-fix-it/) explains the tradeoff against rendering with a real browser engine.
---
Need branded Open Graph cards, blog heroes or social images rendered from HTML without running a browser on your WordPress host? [Browse the templates gallery](https://html2img.com/templates/) or [read the docs](https://html2img.com/docs/) to get started.
`, so it is guaranteed to be present when the page renders.
## Calling the API with `wp_remote_post`
WordPress ships its own HTTP client, the [WordPress HTTP API](https://developer.wordpress.org/plugins/http-api/), so you do not need to reach for Guzzle or raw cURL. `wp_remote_post()` sends the JSON, and you read the URL back off the response.
```
function h2i_render_card( $post_id ) {
$html = h2i_card_html( $post_id );
$response = wp_remote_post( 'https://app.html2img.com/api/html', array(
'timeout' => 30,
'headers' => array(
'Content-Type' => 'application/json',
'X-API-Key' => HTML2IMG_API_KEY,
),
'body' => wp_json_encode( array(
'html' => $html,
'width' => 1200,
'height' => 630,
'dpi' => 2,
) ),
) );
if ( is_wp_error( $response ) ) {
error_log( 'OG render failed: ' . $response->get_error_message() );
return false;
}
$code = wp_remote_retrieve_response_code( $response );
$data = json_decode( wp_remote_retrieve_body( $response ), true );
if ( 200 !== $code || empty( $data['url'] ) ) {
error_log( 'OG render returned no URL, status ' . $code );
return false;
}
return $data['url'];
}
```
A few things are worth setting deliberately. The `timeout` defaults to five seconds in WordPress, which is too short for an image render, so push it to 30. A `dpi` of 2 renders the card at twice the pixel density so it stays crisp on retina screens while keeping the 1200x630 layout. And always check `is_wp_error()` before you trust the response, because a timeout or a DNS hiccup comes back as a `WP_Error`, not an exception. There is a worked [PHP integration in the docs](https://html2img.com/docs/usage/php/) if you want the version outside WordPress.
## Generating the card when a post is published
Now hook it up. The cleanest trigger is `transition_post_status`, which fires when a post moves into the `publish` state, so you generate the card on first publish and on any later edit that republishes. Hooking `save_post` directly works too, but then you have to guard hard against autosaves and revisions, which fire it constantly.
```
add_action( 'transition_post_status', 'h2i_on_publish', 10, 3 );
function h2i_on_publish( $new_status, $old_status, $post ) {
if ( 'publish' !== $new_status ) {
return;
}
if ( 'post' !== $post->post_type ) {
return;
}
if ( wp_is_post_revision( $post ) || wp_is_post_autosave( $post ) ) {
return;
}
$url = h2i_render_card( $post->ID );
if ( $url ) {
update_post_meta( $post->ID, '_og_image', esc_url_raw( $url ) );
}
}
```
This stores the image URL in the `_og_image` post meta key. The leading underscore keeps it out of the custom-fields box on the editor screen, which is what you want for something generated automatically. The [transition\_post\_status reference](https://developer.wordpress.org/reference/hooks/transition_post_status/) and the page on [post status transitions](https://developer.wordpress.org/plugins/post-status-transitions/) cover the related hooks if you want finer control, for example treating a scheduled post going live differently from a manual edit.
If you would rather regenerate only when the title actually changes, store a copy of the title alongside the image and compare against it before calling the API, so editing the body does not burn a render.
## Printing the Open Graph and Twitter tags
The image is no use until the tags point at it. Hook `wp_head` and print them on single posts, falling back to the featured image and then a sitewide default so you never emit an empty `og:image`.
```
add_action( 'wp_head', 'h2i_print_og_tags', 5 );
function h2i_print_og_tags() {
if ( ! is_singular( 'post' ) ) {
return;
}
$post_id = get_queried_object_id();
$image = get_post_meta( $post_id, '_og_image', true );
if ( ! $image && has_post_thumbnail( $post_id ) ) {
$image = get_the_post_thumbnail_url( $post_id, 'full' );
}
if ( ! $image ) {
$image = 'https://example.com/default-og.png';
}
$title = esc_attr( get_the_title( $post_id ) );
$desc = esc_attr( wp_strip_all_tags( get_the_excerpt( $post_id ) ) );
$url = esc_url( get_permalink( $post_id ) );
$image = esc_url( $image );
echo "\n";
echo '' . "\n";
echo '' . "\n";
echo '' . "\n";
echo '' . "\n";
echo '' . "\n";
echo '' . "\n";
echo '' . "\n";
echo '' . "\n";
echo '' . "\n";
echo '' . "\n";
}
```
The `summary_large_image` Twitter card is the one that shows the full-width 1200x630 image rather than a cramped thumbnail.
### Living with Yoast or Rank Math
If you run an SEO plugin it already outputs `og:` tags, and you do not want two `og:image` tags arguing with each other. The tidy option is to keep the plugin for everything else and override only the image. Yoast exposes filters for exactly this:
```
add_filter( 'wpseo_opengraph_image', 'h2i_seo_og_image' );
add_filter( 'wpseo_twitter_image', 'h2i_seo_og_image' );
function h2i_seo_og_image( $image ) {
if ( is_singular( 'post' ) ) {
$custom = get_post_meta( get_queried_object_id(), '_og_image', true );
if ( $custom ) {
return $custom;
}
}
return $image;
}
```
With that filter in place you drop the manual `wp_head` printer above and let Yoast emit the tags, just with your generated image. Rank Math has equivalent `rank_math/opengraph/facebook/image` and `rank_math/opengraph/twitter/image` filters that take the same callback.
## Handling slow renders with a webhook
A single card renders comfortably inside the 30 second window, so the synchronous call above is fine for normal publishing. If you are rendering very large or complex cards, or generating a batch at once, switch to the asynchronous mode: pass a `webhook_url` and the API renders in the background, then POSTs the finished URL to your endpoint. This sidesteps the [30 second timeout](https://html2img.com/docs/parameters/webhook-url/) entirely.
Register a REST route to receive it:
```
add_action( 'rest_api_init', function () {
register_rest_route( 'h2i/v1', '/og-ready', array(
'methods' => 'POST',
'permission_callback' => '__return_true',
'callback' => 'h2i_receive_webhook',
) );
} );
function h2i_receive_webhook( WP_REST_Request $request ) {
$post_id = absint( $request->get_param( 'post_id' ) );
$url = esc_url_raw( $request->get_param( 'url' ) );
if ( $post_id && $url ) {
update_post_meta( $post_id, '_og_image', $url );
}
return new WP_REST_Response( array( 'ok' => true ), 200 );
}
```
Include your own post ID in the original request so you know which post the finished image belongs to when the webhook fires. In production, lock the endpoint down with a shared secret in the `permission_callback` rather than `__return_true`, since anything on the internet can POST to a public REST route.
## Backfilling existing posts with WP-CLI
New posts are covered by the publish hook, but you will want cards for everything already published. [WP-CLI](https://wp-cli.org/) turns the backfill into a single command you can run over SSH.
```
if ( defined( 'WP_CLI' ) && WP_CLI ) {
WP_CLI::add_command( 'og generate', function ( $args, $assoc ) {
$force = isset( $assoc['force'] );
$posts = get_posts( array(
'post_type' => 'post',
'post_status' => 'publish',
'posts_per_page' => -1,
'fields' => 'ids',
) );
foreach ( $posts as $post_id ) {
if ( ! $force && get_post_meta( $post_id, '_og_image', true ) ) {
WP_CLI::log( "Skipping {$post_id}, already has a card" );
continue;
}
$url = h2i_render_card( $post_id );
if ( $url ) {
update_post_meta( $post_id, '_og_image', esc_url_raw( $url ) );
WP_CLI::success( "Rendered {$post_id}" );
} else {
WP_CLI::warning( "Failed {$post_id}" );
}
sleep( 1 ); // stay under the rate limit on a large site
}
} );
}
```
Run it with `wp og generate`, or `wp og generate --force` to rebuild every card after a template change. The `sleep( 1 )` keeps you from hammering the API when you have hundreds of posts to process.
## Storing the PNG in the media library instead
Pointing `og:image` straight at the returned URL is the simplest setup and works fine. If you would rather host the file yourself, in your own media library and behind your own CDN, sideload it after rendering.
```
function h2i_save_to_media( $post_id, $image_url ) {
require_once ABSPATH . 'wp-admin/includes/media.php';
require_once ABSPATH . 'wp-admin/includes/file.php';
require_once ABSPATH . 'wp-admin/includes/image.php';
$attachment_id = media_sideload_image( $image_url, $post_id, null, 'id' );
if ( ! is_wp_error( $attachment_id ) ) {
update_post_meta(
$post_id,
'_og_image',
wp_get_attachment_url( $attachment_id )
);
}
}
```
That copies the rendered PNG into `wp-content/uploads`, registers it as an attachment and stores the local URL in the same meta key. The tradeoff is more storage and a second network round trip on every publish, so only do it if you have a concrete reason to keep the files inside WordPress.
## Skipping the HTML with a named template
If you would rather not maintain the card markup in PHP at all, render against a hosted [Open Graph image template](https://html2img.com/templates/open-graph-image/) and POST only the post data as JSON, which keeps the design out of your codebase entirely. The [blog hero template](https://html2img.com/templates/blog-hero/) covers in-article header images if you want those generated too, and there is a no-code [Open Graph image generator](https://html2img.com/tools/open-graph-image/) for the occasional one-off card.
The rendering approach carries straight across stacks, so the same pattern works wherever you publish. There are companion guides for [dynamic OG images in Laravel](https://html2img.com/articles/how-to-generate-dynamic-open-graph-images-in-laravel/), [in Rails](https://html2img.com/articles/dynamic-og-images-in-rails/) and [in Next.js](https://html2img.com/articles/dynamic-og-images-nextjs-without-vercel-og/). If you have tried a Satori-based renderer and hit its CSS limits, [why @vercel/og fails on emoji](https://html2img.com/articles/why-vercel-og-fails-on-emoji-and-how-to-fix-it/) explains the tradeoff against rendering with a real browser engine.
---
Need branded Open Graph cards, blog heroes or social images rendered from HTML without running a browser on your WordPress host? [Browse the templates gallery](https://html2img.com/templates/) or [read the docs](https://html2img.com/docs/) to get started.